
readme.md (3837B)
1 # DQz11N1G 2 3 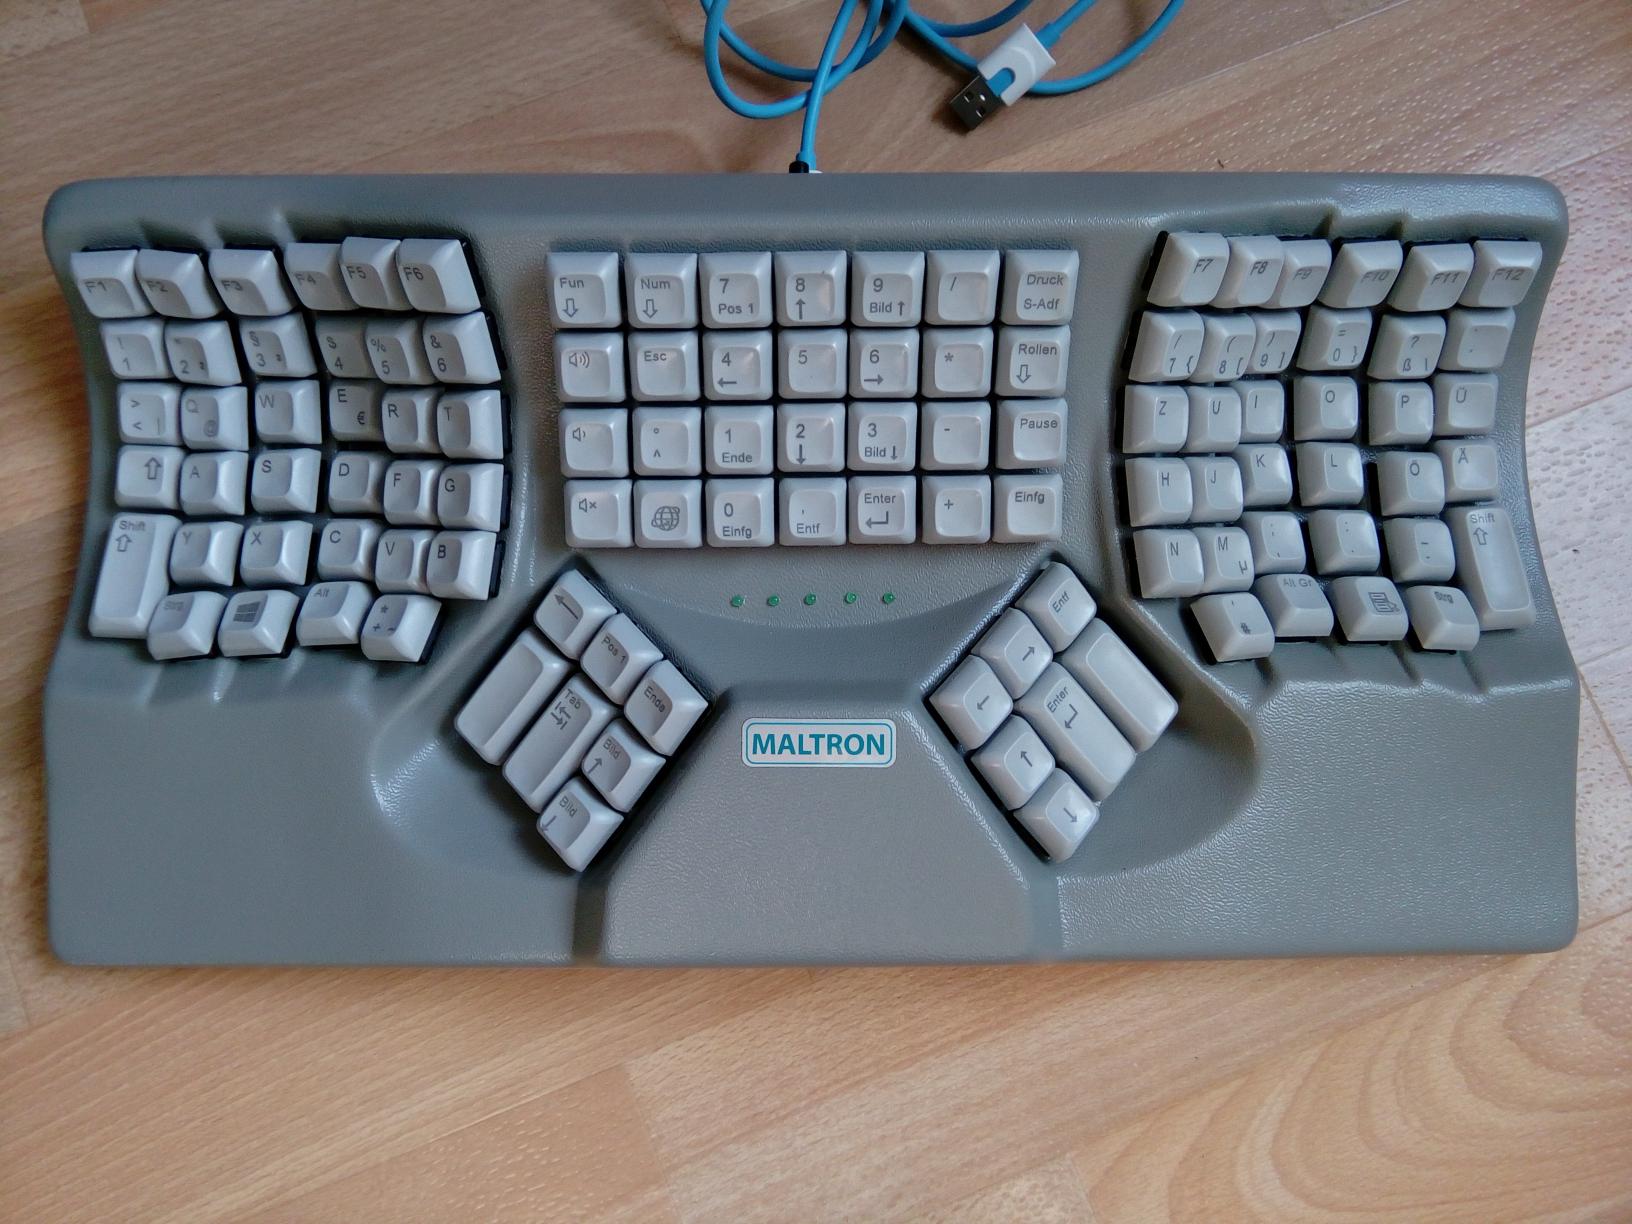 4 5 Using QMK with one of the ortholinear contoured keyboards manufactured by [PCD 6 Maltron Ltd](https://www.maltron.com) by modding it with a DIY replacement 7 controller. 8 9 This work here in no way officially associated with PCD Maltron Ltd and comes 10 with ABSOLUTELY NO WARRANTY, to the extent permitted by applicable law. 11 Modifying your Maltron keyboard as described below will certainly void your 12 warranty and may e.g. cause damage to your keyboard. Proceed at your own risk! 13 14 * maintainer: [David Kuehling](https://github.com/dvdkhlng/qmk_firmware_dqz11n1g) 15 * Hardware Supported: Maltron DQz11N1G with a replacement controller board 16 assembled as described below. The work here is based on a German version 17 of the keyboard: DQz11N1G-DE. I assume, but don't know for sure, that 18 minor or no changes at all are required to make this work on different 19 language versions of the keyboard. 20 * Hardware Availability: 21 * [PCD Maltron Ltd](https://www.maltron.com), for the original keyboard 22 * 1x [Arduino Pro Micro](https://www.sparkfun.com/products/12640) 23 * 3x shift register [SN74HC165](https://www.ti.com/product/SN74HC165) 24 * 3x ceramic blocking capacitors (100 nF) one for each shift register 25 * 1x DIL connector 2 rows a 17 pins. 26 * 19x pull-down resistors (10k Ohm), 27 * 4 LED current limiting resistors (not sure about the correct resistance, 28 using 470 Ohm here) 29 30 Make example for this keyboard (after setting up your build environment): 31 32 make handwired/dqz11n1g:default 33 34 ## In Detail 35 36 [PCD Maltron Ltd](https://www.maltron.com) manufactures ergonomic keyboards 37 that appear to be hand-wired internally. For the Maltron DQz11N1G-DE 38 keyboard that I happen to own, the keyboard matrix is wired to a 34-pin DIL 39 connector. This makes it rather easy to replace the proprietary 40 controller-board with a self-made board based on the QMK firmware. 41 42 I don't really like the default layout of my Maltron DQz11N1G-DE keyboard, 43 and modding it to work with QMK allows me to adapt it to my needs. It 44 especially allows for the two space keys to assume different roles, thereby 45 creating an additional easily reachable thumb-key. 46 47 ### Internal Details of Keyboard Matrix and DIL Connector 48 49  50 51  52 53 ### Replacement Keyboard Controller Board 54 55 Due to supply chain problems, I decided to base this on an 56 Arduino-compatible [Pro Micro](https://www.sparkfun.com/products/12640) 57 board which is still easy to source. 58 59 Unfortunately pin-count of the DQz11N1G-DE's keyboard matrix is way beyond 60 the Pro Micro's available I/O pin count. I'm using three 8-bit 61 shift-registers ([SN74HC165](https://www.ti.com/product/SN74HC165) ) to 62 connect the 19 columns of the keyboard matrix for readout. Due to diode 63 direction in DQz11N1G-DE we also need 19 pull-down resistors one for each of 64 the utilized shift-register inputs. 65 66 This is a design sketch of the replacement board this is based on. Note how 67 we need a custom matrix.c source file to deal with the shift register based 68 keyboard readout. 69 70  71 72 This is how the assembled controller board looks like, on the right side you 73 see the original PIC-based controller the keyboard ships with. 74 75 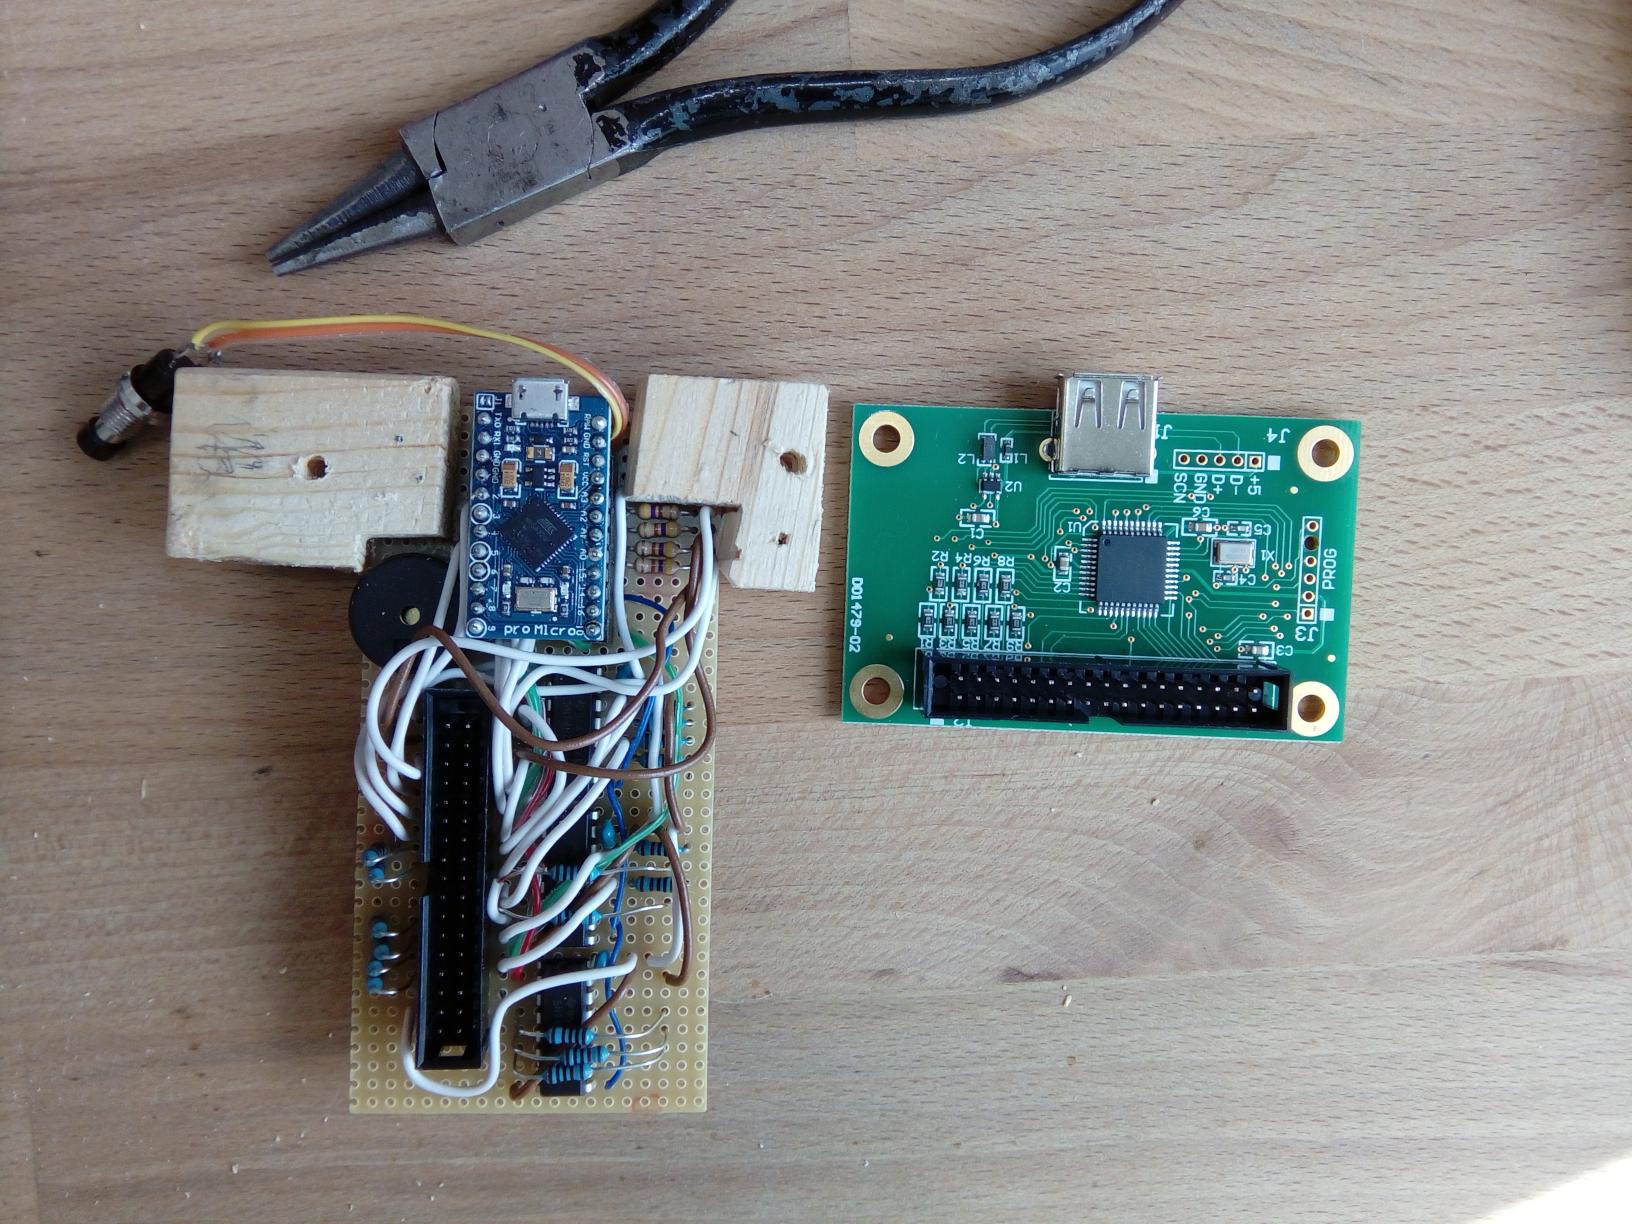 76 77 Inside of the keyboard after installing the new controller board: 78 79 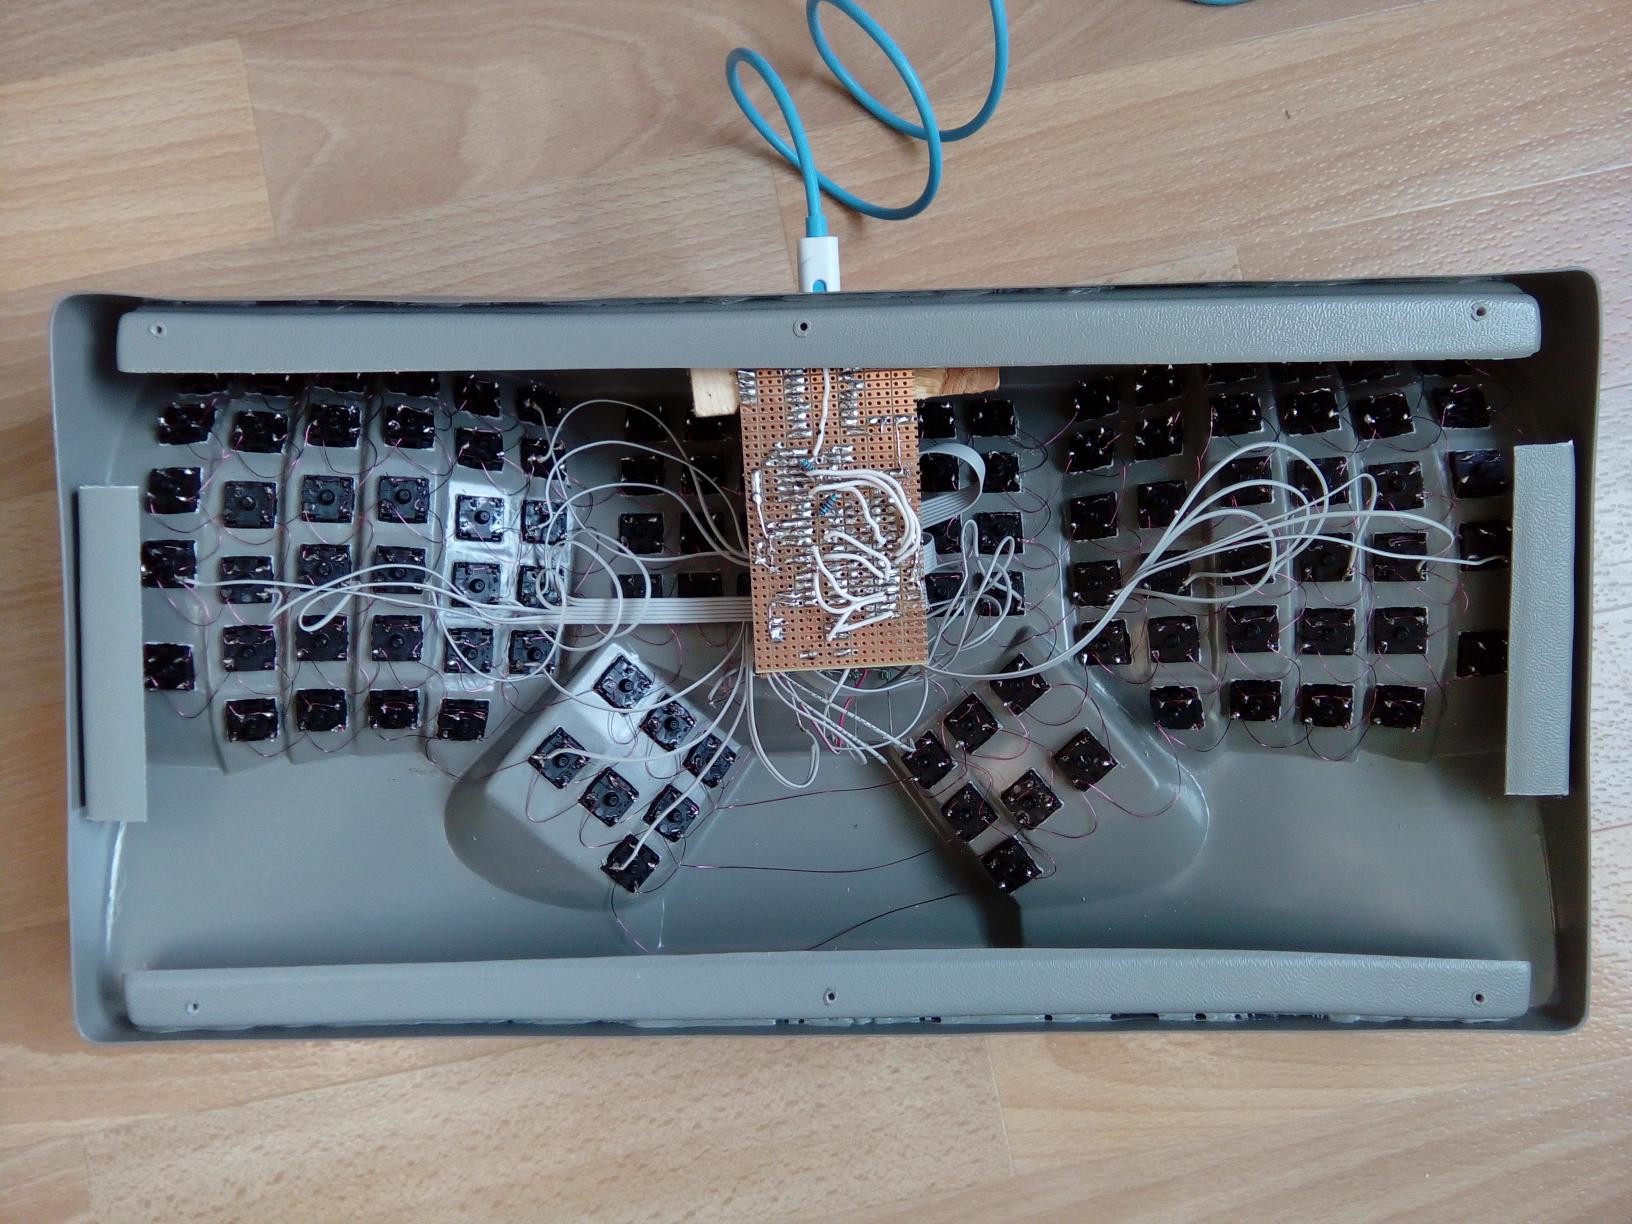 80 81 (Not visible in the photo: I drilled hole into the keyboard above the USB 82 connector for a reset switch to simplify flashing controller firmware)